
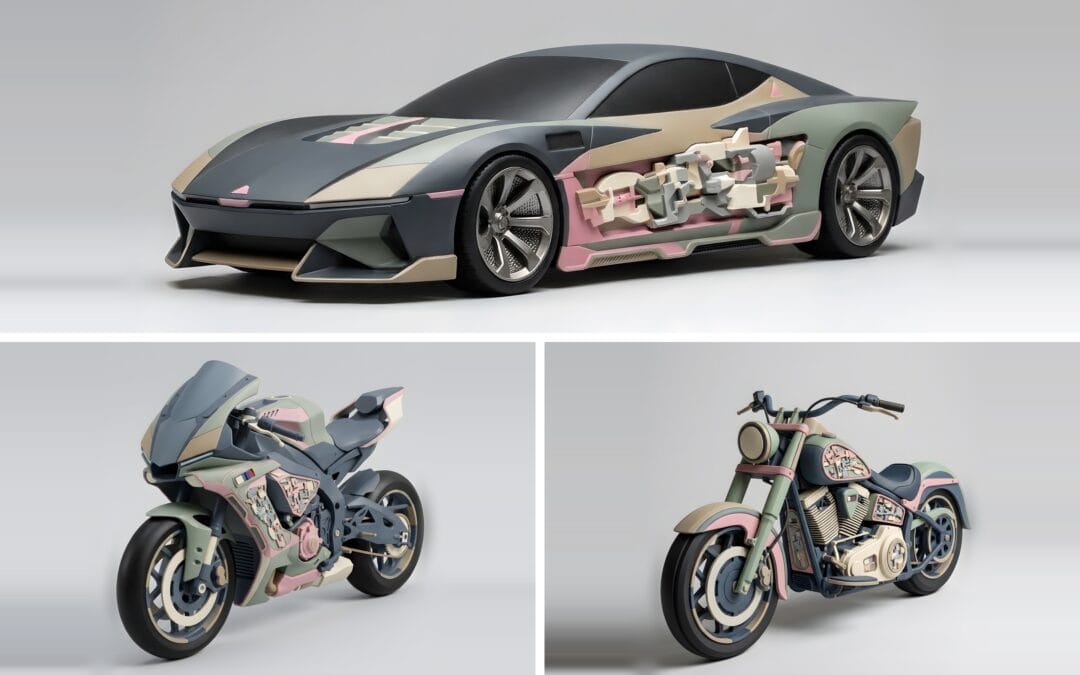
What might a car look like when it is built out of fragments of your own drawings?
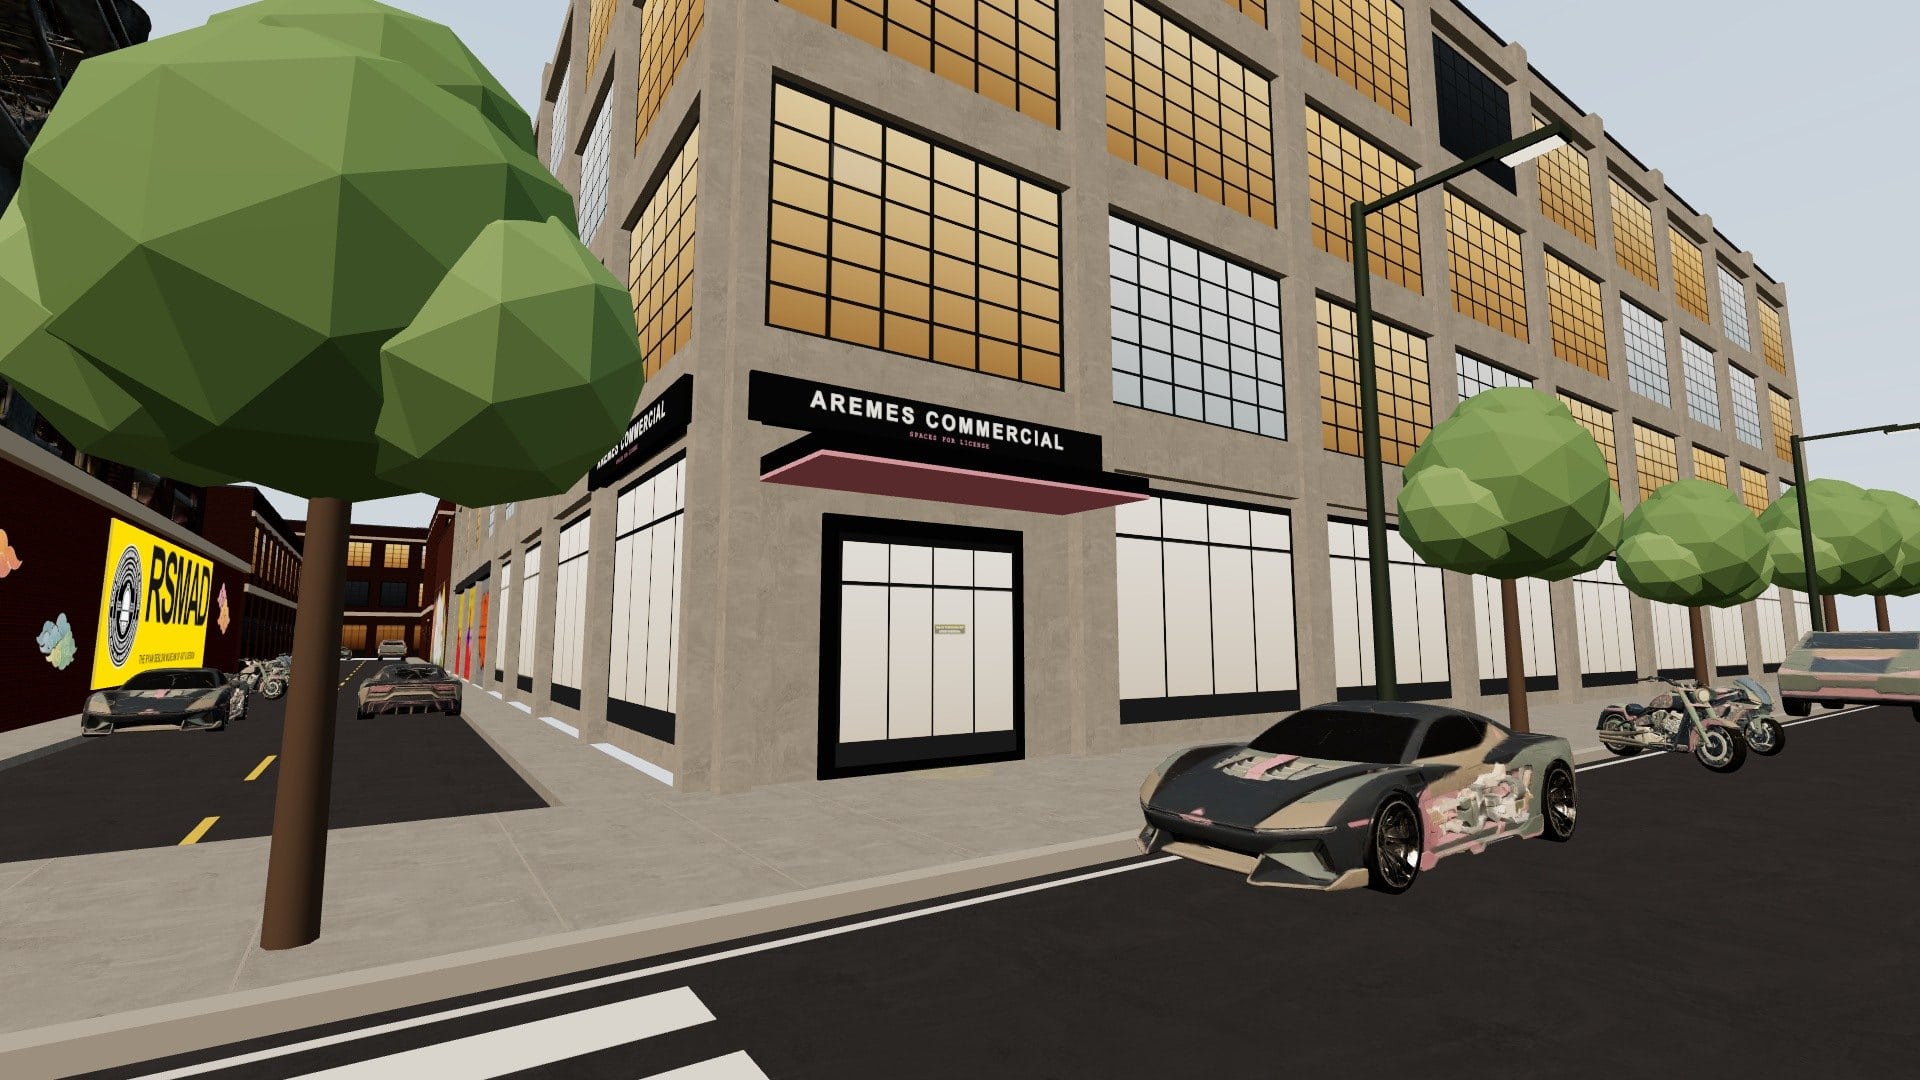
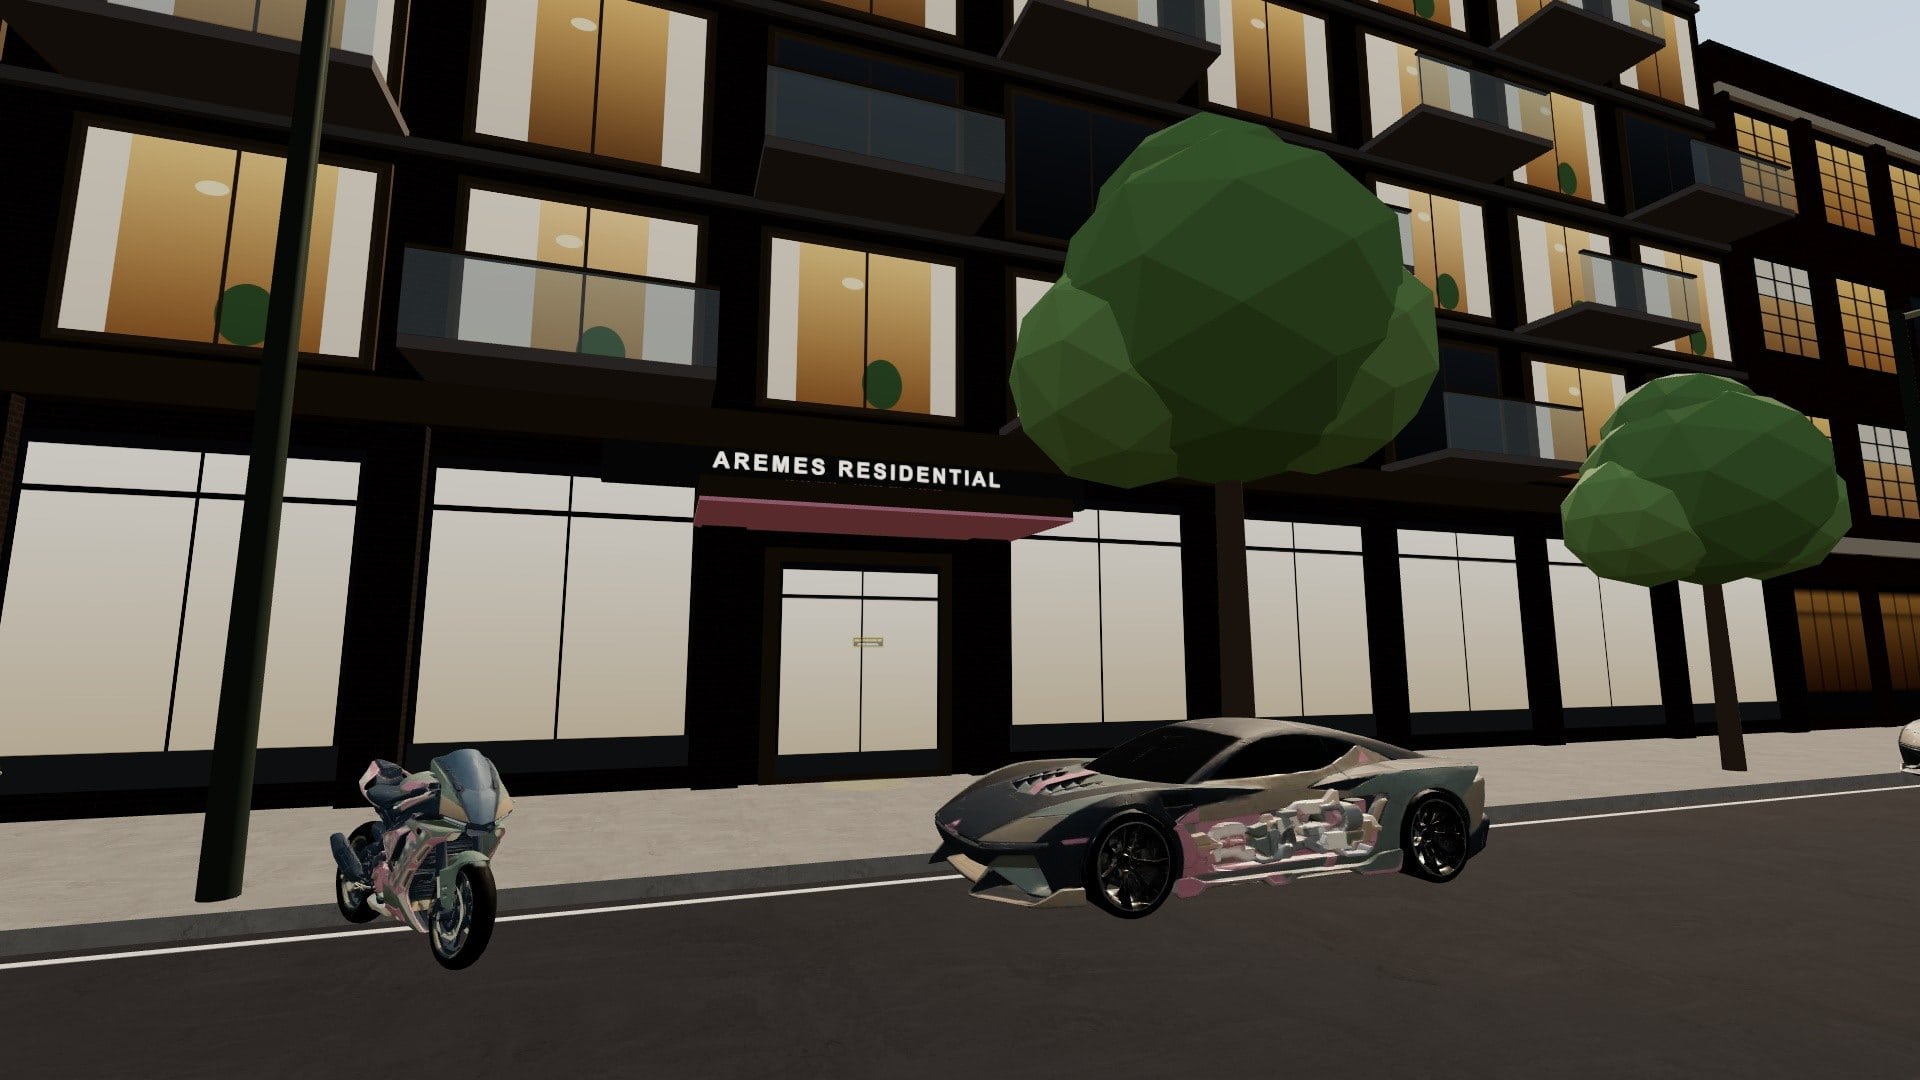
That question has been with me for weeks. The answer is parked on Union Street in Red Hook right now, along with a sport bike and a V-twin cruiser. Three vehicles, and every panel, vent and seam on them traces back to shapes I have been drawing for years.
And as of this weekend, you can ride one.
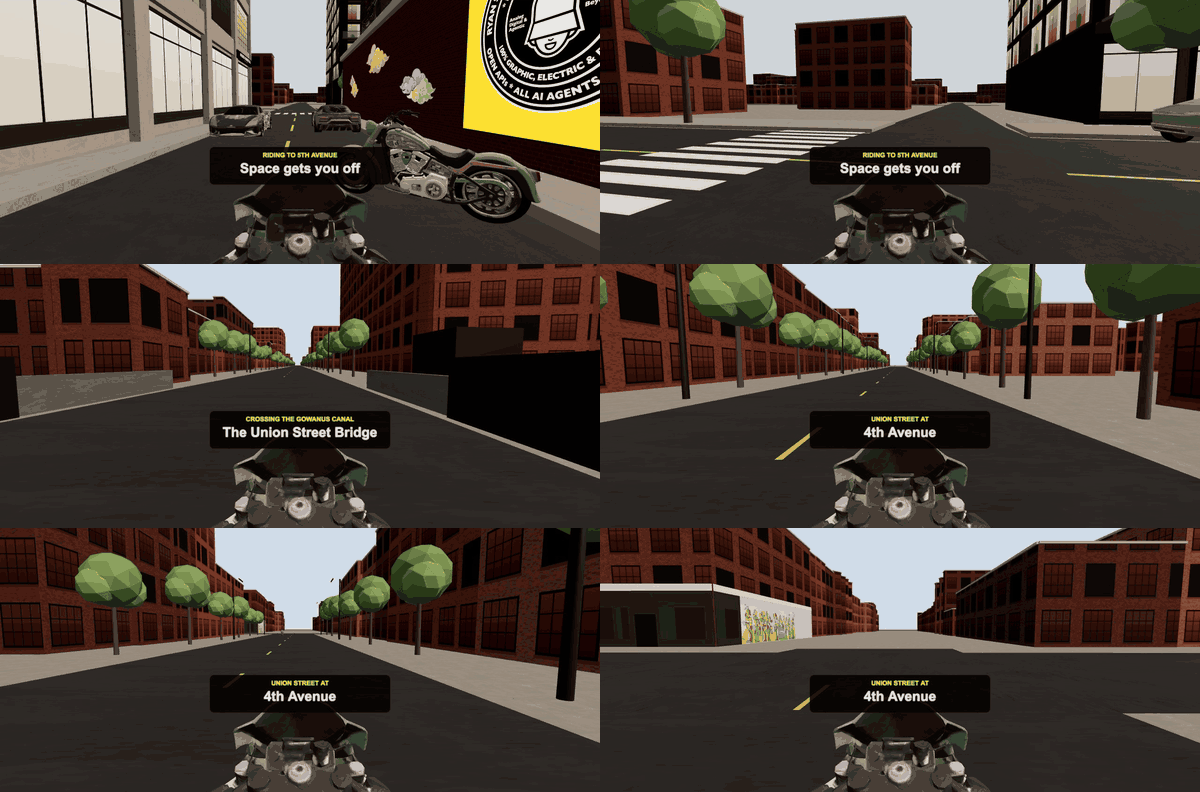
Walk up to the sport bike on Van Brunt Street and climb on. It carries you down the real Union Street, over the Gowanus Canal bridge, past every cross street, all the way to Fifth Avenue in Park Slope. About two minutes each way. A card names each street as you pass it, in the browser and in the headset too. I love this ride, and I have ridden it more times than I will admit here (OK, a lot, and it is just as much fun every single time)!
Was this always the plan? Not even close.
The First Cars Were Wrong
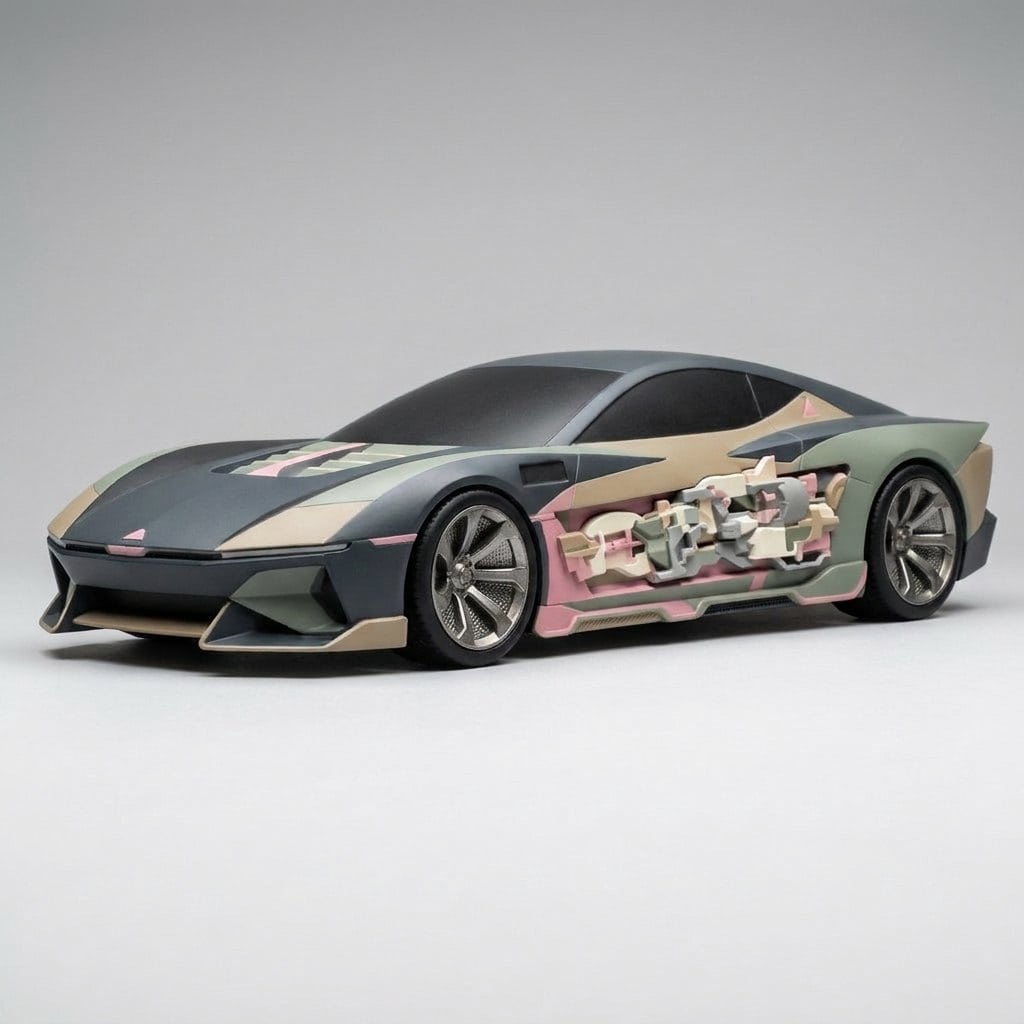
The first cars on the street were built in code. Clean boxes and smooth wheels, the kind of vehicle every VR world already has, and when I walked past them I felt nothing. Worse than nothing! (But it did make me laugh.) They looked like a generic, default, old VR video game world, and I said so.
Then I said the thing that turned the whole thing around. Look deeper at my work. Look at the AREMES parts and pieces. (There are many, more than I have even organized, which is a good problem to have!)
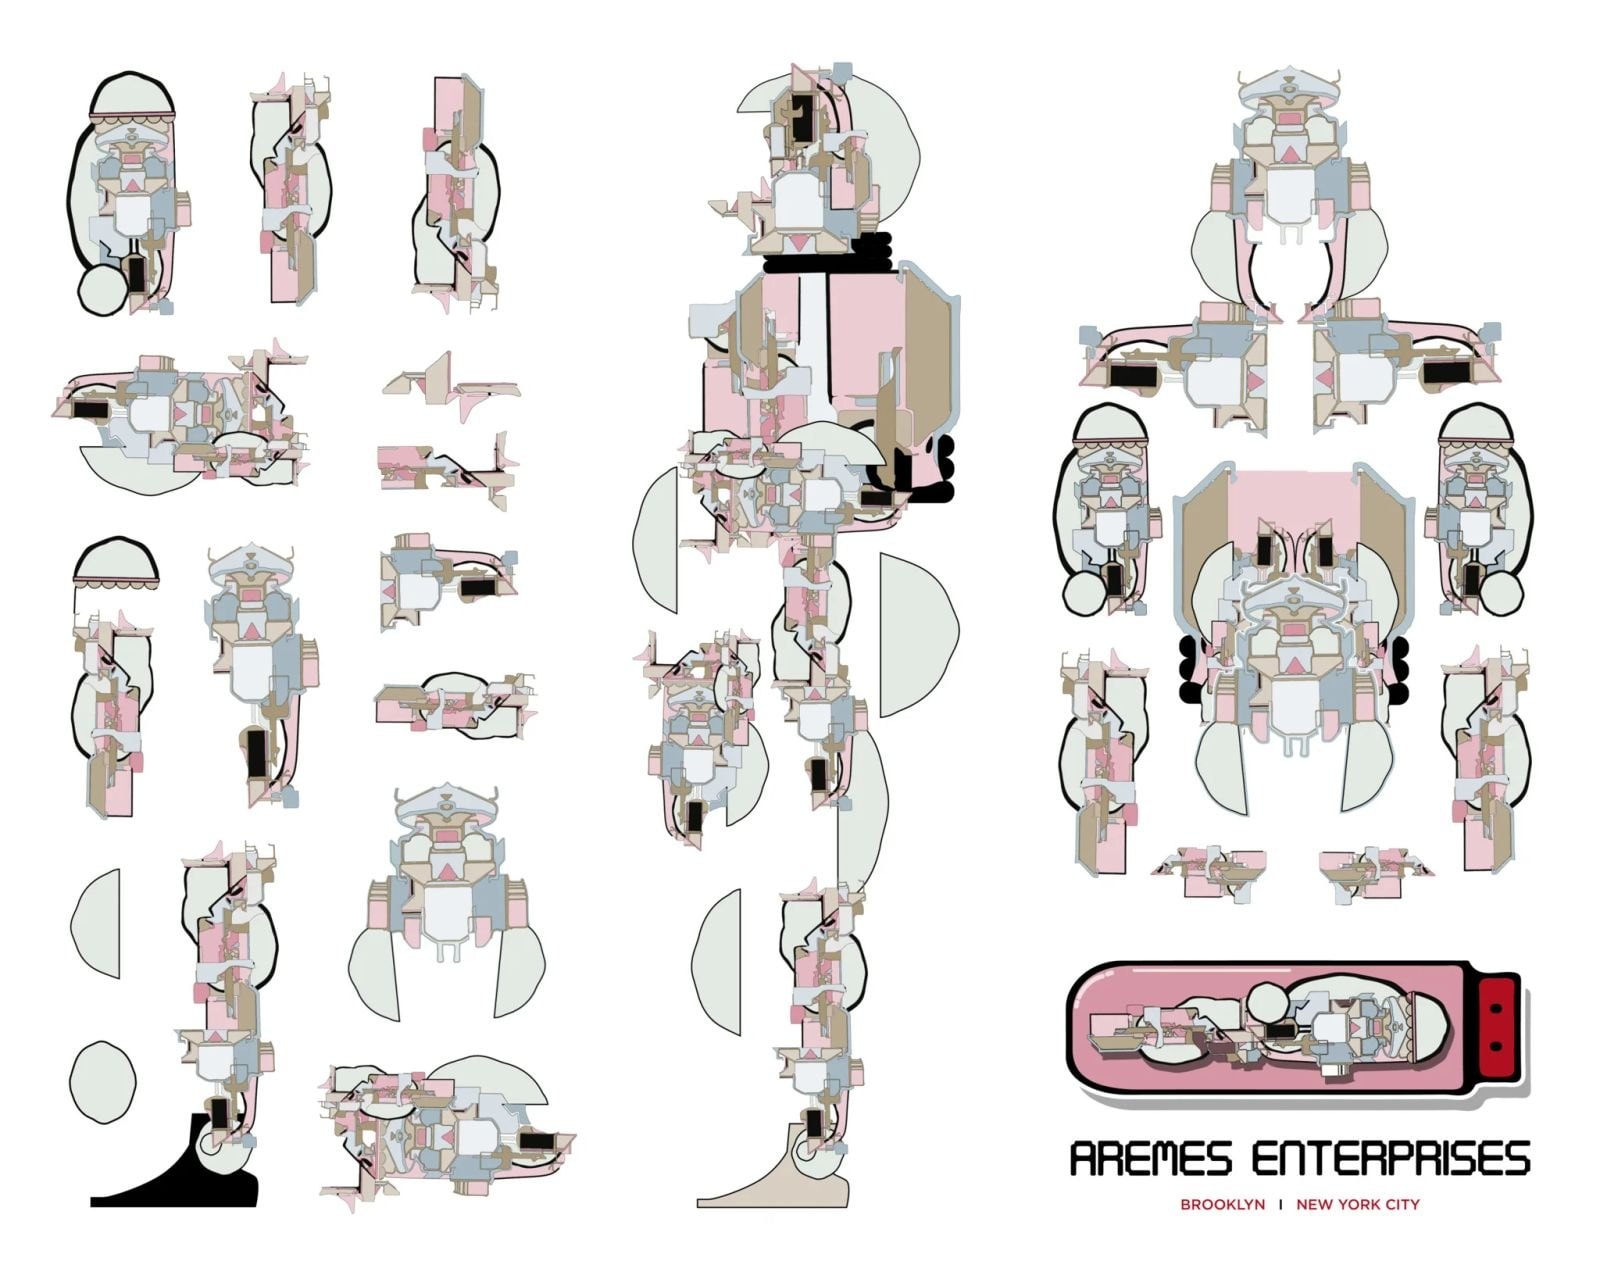
The parts were already there. The FCS001 sheet is a drawing I made of the first iteration of the AREMES Inter-Dimensional Body Suit, taken apart, every plate and hinge and connector laid out flat like a pattern on a cutting room wall. The Physio-Activation Drive drawing added more. Those fragments have their own logic, their own way of locking together.
They didn’t need to be invented. They needed a body.
How Far Back Does This Go?
Further than this month, much further, and this is the fun part.
The 1980s NYC subway cars covered in graffiti inspired me from the get go. Think about it, those were the first vehicles I ever cared about! Moving canvases, rolling through the city, carrying somebody’s style from borough to borough. Is it any surprise that I would eventually want to build my own?
I became aware that computers were a tool for making art as far back as 1986. In 2014 I was building relief sculptures out of found wood scraps. In 2016 I was augmenting paintings at the Met with my iPhone (you have been to the Met, right?). In 2017 I took my graduate students to Giphy and Planeta to walk through a GIF museum in VR. In February 2021 I was taping paper cut-out characters to my studio wall, and I wrote that 3D was inevitable, both as a physical sculpture and as a 3D model in a digital space. Two months later I ended a post with “OK, so now I’m off to make some 3D models of these for Virtual Reality.”
I meant it. It just took a few more loops around the sun.
In 2023 I spent a residency working inside a VR editor with the Loop Art Critique. This spring I was pulling forms out of my paintings with a Quest 3 and Open Brush. Flat drawing, to cut paper, to relief, to animation, to AR, to VR. Every one of those steps is in this car.
Sleek, Aggressive, Fluid
I knew exactly what I wanted them to be: sleek, slightly aggressive, masculine and fluid. One early version came back as a cute little pod and it read like a kid’s toy, so out it went. Another pasted my parts flat across the side of a car, and the perspective was 1000% wrong. A fragment has to sit inside the body and follow the curve of the panel, the way a tattoo follows a shoulder.
So the process slowed down and got strict. I built all of this with Claude, my AI collaborator, working in the terminal on my iMac in the studio. Claude wrote the code and ran the tools, and I made every call along the way (and yes, I said no a lot). Here is the whole stack, the same way I used to break down a GIF tutorial.
Step 1: Start from the drawings. The FCS001 parts sheet, the Physio-Activation Drive and my V3 product sheet go in as reference images. Nothing gets invented from scratch, and I love that.
Step 2: Design in 2D first. Meshy’s image to image tool redraws my parts into a vehicle, locked to my palette, my black outlines and my flat fills. Nothing moves forward until I approve the 2D, period.
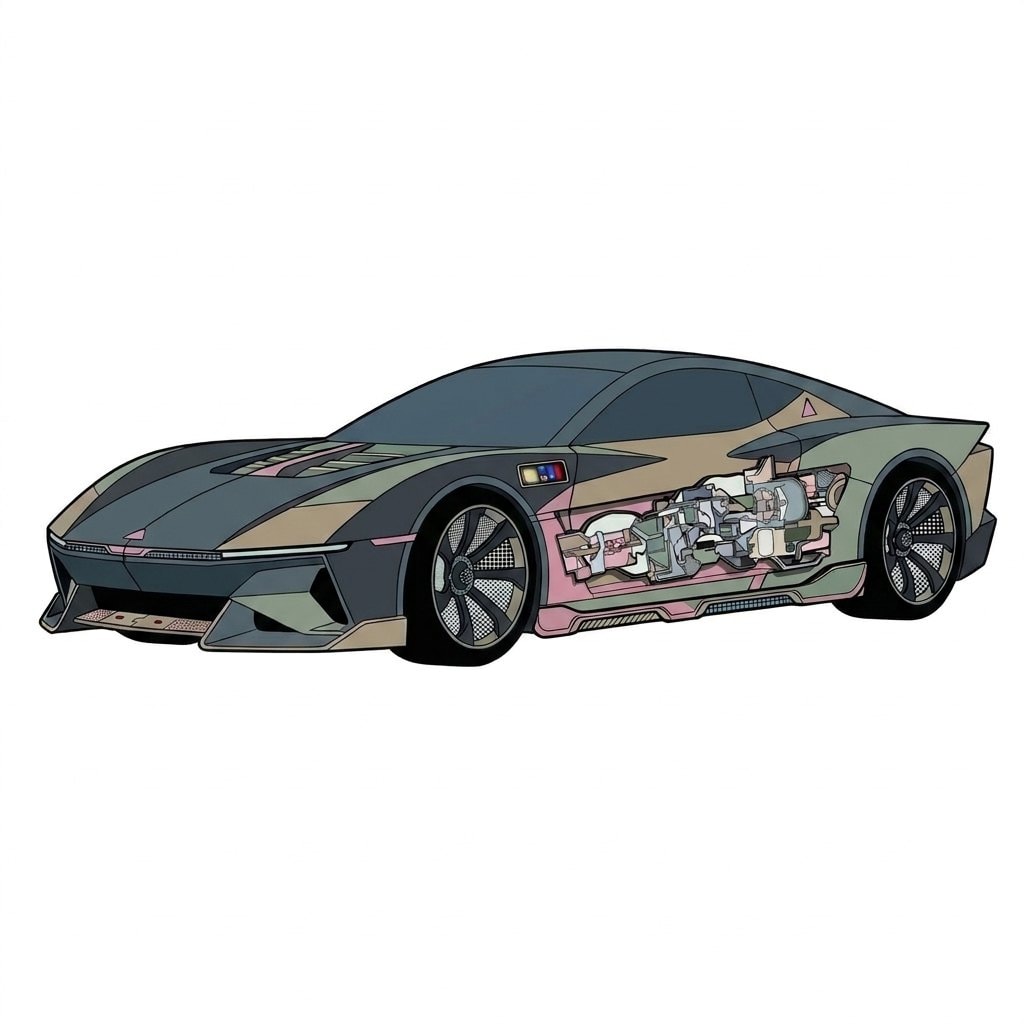
Step 3: Get the views. Side, front and back, made from the approved design.
Step 4: Build the 3D. Meshy’s multi-image to 3D turns those views into a full textured model.
Step 5: Raise the relief. Oh yes, this was the pass that changed everything! We went back to the approved 2D and asked for every fragment raised off the body 1 to 4 centimeters, stacked in layers with beveled edges and real cast shadows. Then new views, then a new model with 4K textures, and I was so excited when the first one came back! If you know my 2014 wood reliefs or the 2021 paper cut-outs that popped off my studio wall, you know exactly where this comes from.
Step 6: Make them light enough to drive. A 40 MB car is fine for a buyer. For a street you walk down in a headset? Way too heavy. glTF-Transform shrinks each one to about half a megabyte for the street, which is light enough for your headset and your phone to keep up while you ride past.
Step 7: Bring them into AR. Android and desktop read the GLB file. iPhones want a USDZ file, so we exported one with three.js and ran it through Apple’s own usdchecker until it passed. Every model is built at real-world size, which is why the GT fits your driveway and not your coffee table.
Step 8: Park them, then ride them. The street runs on three.js and WebXR, right in the browser, no app to download. The street itself is real too, every building on Union Street placed from New York City’s open data and OpenStreetMap.
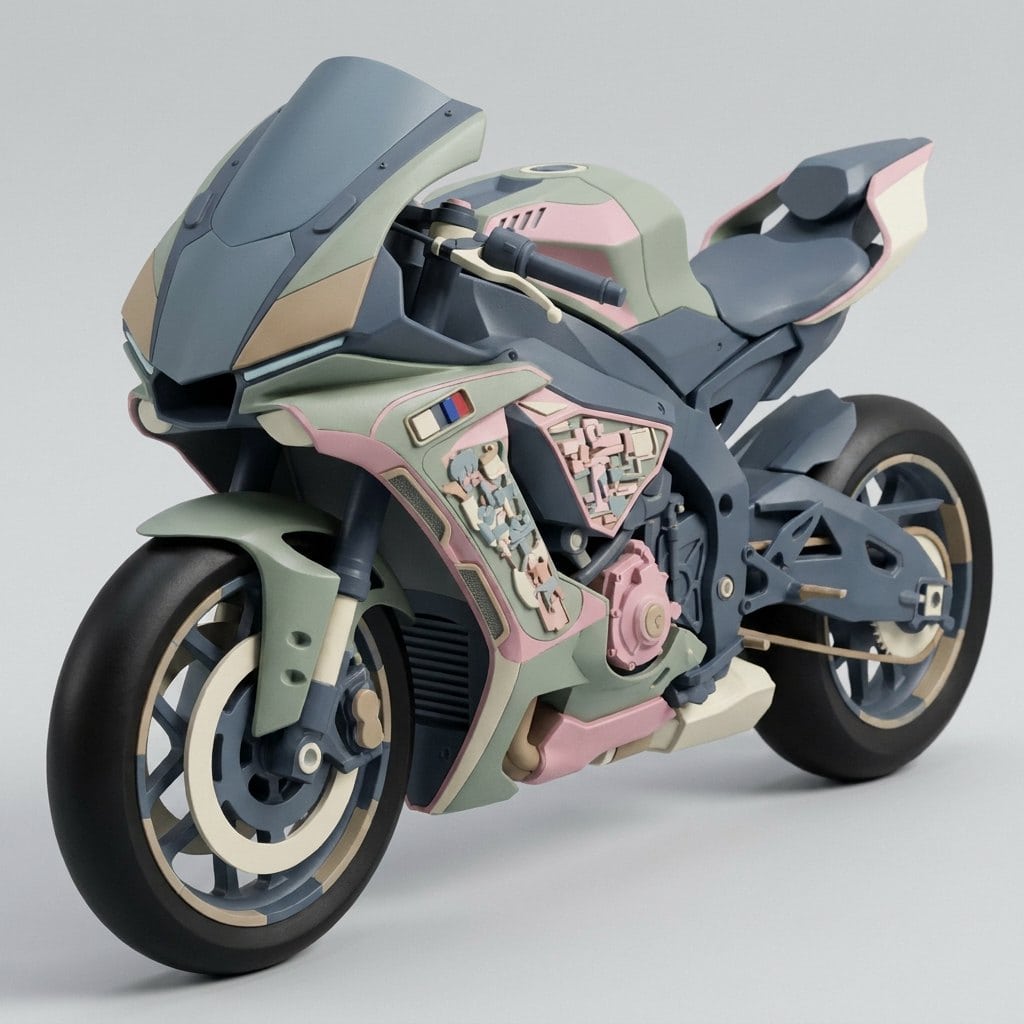
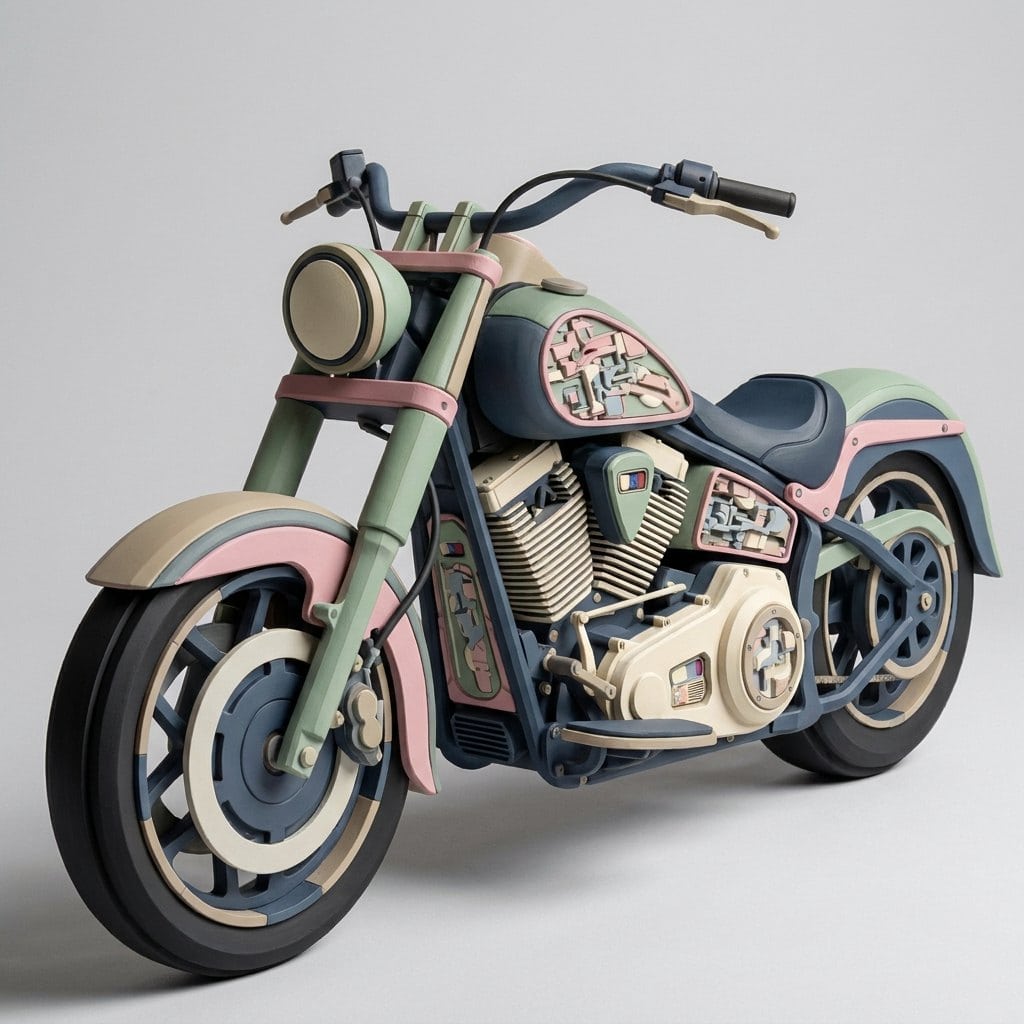
I want to be open about the tools because I believe they are mediums, and my art making process, since I was a child, has been about the wonder of materials and taking on new ones. The views and the 3D meshes were made with Meshy, an AI 3D tool, working from my artwork, and I chose and approved every result along the way. The drawings are mine, the parts are mine, and the eye that said no, no, no, yes is mine too.
Parked on Union Street
The GTs are parked along Van Brunt Street outside AREMES HQ. The bikes and cruisers are backed in under the RSMAD wall. You can walk right up to them in a browser, or put on a headset and stand next to one at full size. A car has a back, and a bike has a tank you can lean over and look into.
On a phone or a tablet you can bring them home. Each vehicle has an AR version, so you can set the GT down in your driveway or the cruiser in your living room, at real size. What would you park in yours?
License One
Here is the part that still makes me smile. All three vehicles are for license as 3D files, and so are the three Interdimensional Suits built from the same parts. One month is $25, one year is $150, and $450 keeps the model for good. The files come with the full GLB, the USDZ for AR, the side, front and back views and the license itself.
And it isn’t only people who can buy them. An AI agent can license a model on its own, paying in USDC, for the person or company it works for. A 3D model built from an artist’s drawing, sold to a machine. We are living in interesting times!
Turn them in 3D, see them in AR and license one at aremes-enterprises.com/vehicles. Or walk down Union Street, find the bike, and take it for a ride.
What Comes Next
I counted this morning. 120 3D models in about fifty days. Vehicles, suits, the Parts in the Round, freestanding sculptures, glossy inflated blooms. All of them speak the same visual language because they all came out of the same drawings.
We could build literally anything with these components. Where does that end? I honestly don’t know, and I don’t want it to. What would you build out of them?
Oh, I’ll make more.


